![]()
![]()
712-578-9336
Home | All Kits | Foam Wings | Accessories | Custom Foam Cutting | Contact Us | View Cart
Building the cowl for the Skyracer
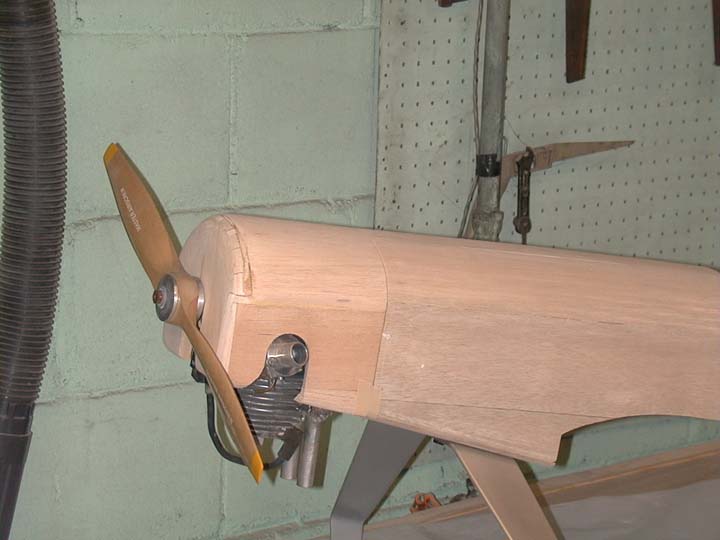
It is best to do build up the cowl before the bottom plywood is installed under the nose of the plane. Mount your engine to the firewall and away we go.
The first thing to do is to glue the upper doubler to the front piece if the cowl. This allows for rounding the front of the cowl.
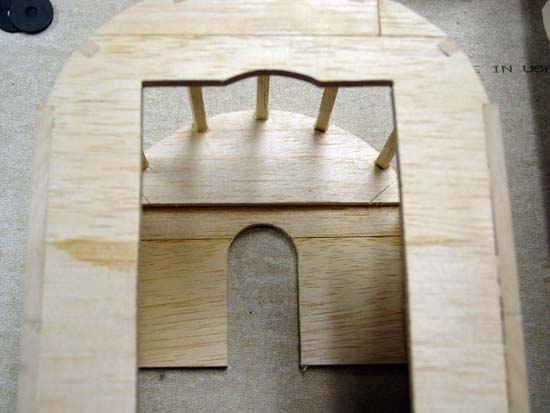
Next measure the clearance needed for the cowl rear former. You only need about 1/8" clearance. The cowl will slide on from the top. My measurements for my Quadra 42 are 3.5" wide by 4.75" high.
The next measurement is from the front of the firewall to the location you want the front of the cowl to end up at. This will be the length of the 1/4" cowl sides. For the Quadra 42 I made the sides 6" long. This will vary depending on the engine mount and the prop mounting on your engine, and how much distance you want between your cowl and the prop. You may need to enlarge the 'slot' in the front cowl former to suit your engine.
Make the cowl sides from two 3" wide pieces of 1/4" balsa glued together. Leave them extra tall for trimming after the bottom plywood is glued to the front of the aircraft, so you can get the angle and height right.
Be sure the cowl sides are squared off, and glue the front and back cowl formers to the cowl sides using a square to be sure the sides are at 90 degrees. When dry, glue the other side to the cowl formers, again keeping everything square.
Clamp the cowl frame on the plane and admire it before continuing.
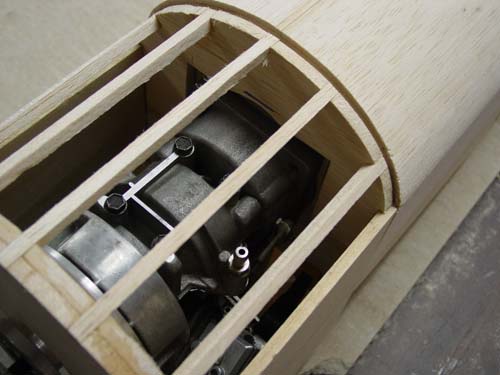
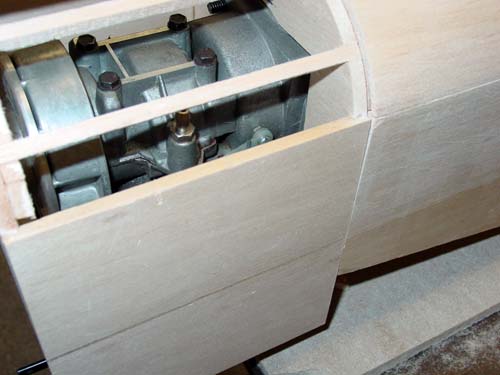
Now is a good time make the cutout for the carburetor and velocity stack if attached. This will again depend on your engine. See the top picture to get an idea on how to do it. Remember the the cowl slides on from the top.
When done admiring your work and calling your spouse to look at your creation, unclamp the cowl from the aircraft.
Next glue the Five 1/4" square balsa stringers in the slots in the cowl formers, and sand flush.
Glue a piece of 1/2" or 3/4" triangle stock on the inside corners of the cowl. These are both for strength and to give more sanding radius on the front of the cowl. Triangle stock can also be glued along the bottom of the cowl sides to make is more rigid. This can be done after the cowl sides are cut to match the fuse sides.
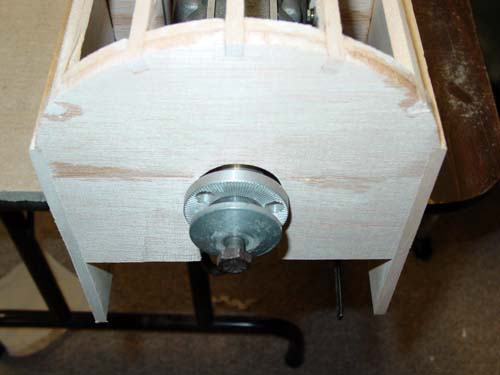
The next step is to mount the cowl to the plane. The method I use is to place 6-32 blind nuts from inside of the firewall at locations that can be accessed from the front of the cowl. (Remember I said to do this before the ply bottom is glued to the front of the aircraft? this is why.)
4 bolts are usually fine for mounting purposes, 2 left and right above the engine, and two near the bottom of the rear cowl former.
The 6-32 allen head bolts are accessed through small holes drilled in the front of the cowl. Since the bottom of the cowl is open for engine cooling, it is convenient to mount the bottom 2 low enough for access without drilling in the front of the cowl. Be sure that they are not too low for the blind nuts to fit behind the firewall.
Now that the blind nuts are mounted, and the cowl is test fit to the aircraft, you can attach the top 1/8" sheeting to the cowl as you did with the front of the Skyracer. The result is a light, old time looking cowl, that is easy to cover and color match to the rest of the plane.
After the rest of the aircraft is finished, you can cut off the sides to match the angle of the nose of the Skyracer, and sand the front of the cowl to the radius you feel looks right. If you decide for a very rounded cowl, you will need to add some strips inside the front of the cowl to allow more rounding.
Be sure to fuel proof the entire inside of the cowl when done.
If you wish to use a different method to mount the cowl to the Skyracer, use whatever way you are comfortable with.
copyright 2021 EAC